Drywall Repair Job | Walk-through
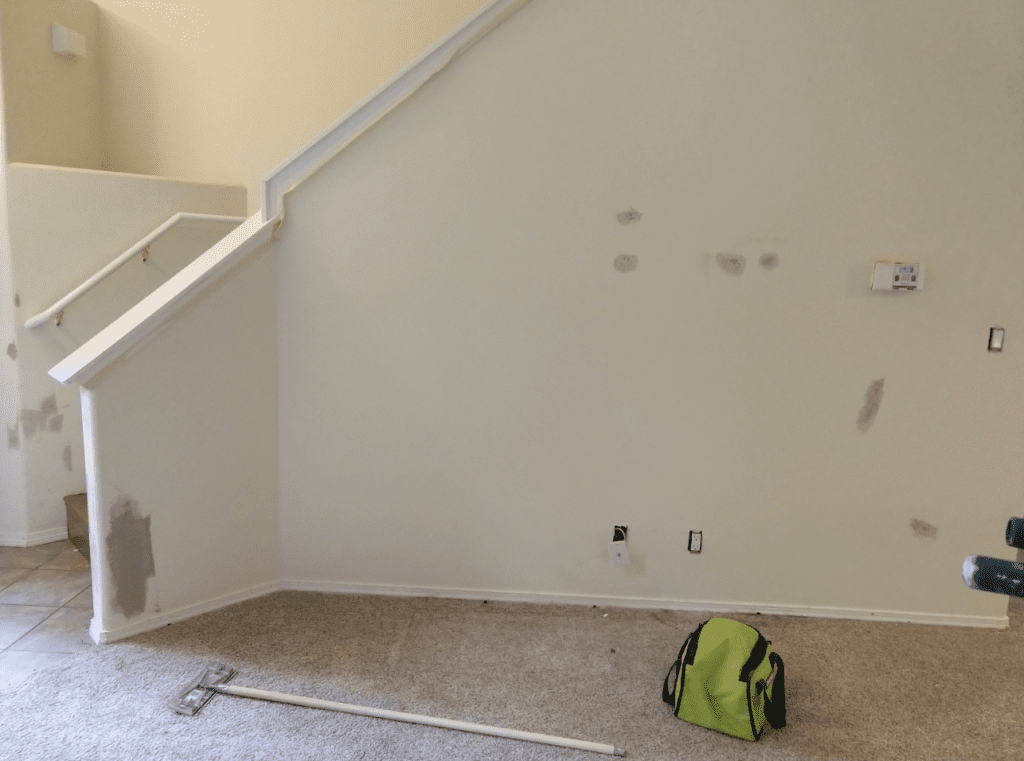
We were hired by a client in Orchards, just outside of Vancouver, WA for drywall repair job, interior paint and luxury vinyl plank installation. This post is intended to document the drywall repair portion of the job. You will learn about our wall repair process from animal damage. Interior wall damage caused by dogs is not uncommon. Bumping, clawing and chewing up walls can occur however, an experienced drywall repair person can make the damaged walls look as good as new.
Repairing drywall is not a complicated process, but it is important to know the steps so let’s review them.

Steps:
- Mask off floor
- Apply joint compound
- Sand excess joint compound
- Texture over patch
- Paint
Masking
Start the repair process by masking off the floor or carpeting. Joint compound or “mud” as it is called in the business is very messy, especially if you are not used to working with it, regularly. You’ll want to be sure to mask off a large enough area to catch dust when sanding as well as catch over spray when shooting texture. We typically use three foot wide construction paper and roll out a 5-6 foot long strip of paper for a 12×12 inch drywall repair. This may seem too much masking paper but it is better to be safe than sorry when spraying texture.
Joint Compound Application
For the drywall repairs in this job, we were able to patch with just mud, which is the best case scenario. Typically, we would need to cut out old drywall and screw in new pieces to complete a patch. Cutting out old drywall and replacing it with new is more costly and takes more time and materials. When a wall repair requires the use of new drywall, the process is different, learn more about that HERE. As for the process of mudding on this job, it was pretty simple. We used a fast setting joint compound. See our post on different types of joint compounds if you are unsure of how they can be used in different situations. These repairs took three coats of mud which is standard. We used 6, 10 and 12 inch drywall knives to apply compound.
Sanding
No drywall repair job is complete without sanding. Sanding is the worst part of drywall work, but is necessary for a smooth finish. Without sanding, your finish will look uneven and it will stand out in a very noticeable way. On this job we used our electric vacuum sander for the bulk of the work and our hand sander to feather in the edges. Pro tip: to get a perfect transition between your existing wall and the newly applied joint compound after sanding, we have found that wiping down our edges with a damp sponge works beautifully. Be sure to wear a mask when sanding. Joint compound dust particles are extremely fine and it is not healthy to breathe in.
Texture
Spraying texture is the least forgiving part of a drywall repair job because there is no margin for error. To get a seamless transition between prior existing texture and the new texture, it must be sprayed on properly the first time. To understand more about spraying texture. On this wall repair job we chose to use an oil based canned spray texture. Although texture in a can is more expensive than using a hopper, we wanted to use the fast drying aspect to our benefit. Oil based spray texture is ready to paint within 5-20 minutes of spraying. Oil based texture is great for jobs where time is a limited factor!
Paint
Painting is the final step of a drywall patch. You will want to take a paint sample to your local paint store to get an exact paint match. Part of the scope of work for our client on this job was to paint the entire interior. However, if you are not painting all the entire wall after a drywall repair then a paint match is critical.

Conclusion
Drywall repair and patches are something you can do as a homeowner with a few tools and a little knowledge. However, if you are in the Vancouver, WA area and would like your walls repaired by professionals then consider giving us at Northwestern Contractors a call. We can schedule a time for a fee estimate. To continue reading more about this job, check out our post on the painting process and the vinyl plank flooring installation. We wish you luck with your home remodels and repairs!

